
Build an Email Campaign Using a Campaign Blueprint
There are three ways to create an email campaign in PropFuel: (1) From a blueprint, (2) From scratch, and (3) From an existing campaign. Read on below for step-by-step instructions for building from a blueprint.
Creating an Email Campaign from a Blueprint
Creating from a blueprint is the fastest and most effective way to build a PropFuel campaign. Blueprints are pre-built campaigns to help you get started quickly. If you’d like to learn more about what Blueprints are and how they work before you start, check out this guide on Blueprints for a deeper understanding.
Getting Started
Login to your PropFuel Account
Set your default templates for this campaign under Settings > Templates. Blueprints will always use the default templates from your account settings, indicated by a star. To switch templates for this blueprint, find the ones you want, click the three dots, and select “Make Default.”
Navigate to Campaigns
Click the Create New Campaign button
Under Create From Blueprint, select the blueprint you'd like to run

Then click on the down arrow next to the type of campaign you want to run, and select the blueprint from the list shown.
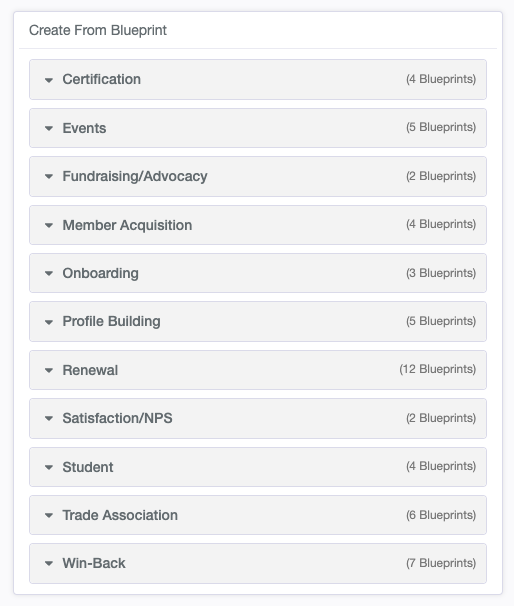
Depending on the campaign there may be a few different versions of your blueprint, so pick which is relevant:
Individual vs organization memberships
Sequence vs scheduled
Running the Blueprint
Fill in all the fields - all fields are required
Click Run button to generate the blueprint campaign
Editing your campaign
Once the blueprint runs, you will want to look through it to make sure the language and workflows provide the details that you want. Follow these steps for editing a PropFuel check in.
Getting your Campaign Live
Once you're confident you've made all the changes you'd like, send yourself a test email of each check in.
Next enroll your contacts. You can do this by:
Adding segments: Navigate to the Contacts tab and add your segments to the Included Segments section, also add any suppression segments. Choose your sync behavior (Continuous Sync, Add Only, or Fixed) based on your campaign needs.
CSV upload: Use the 3-dot menu in the Enrolled Contacts section to upload contacts directly via CSV.
Make sure to also check your settings for reminders and sending window to adjust to the timing you would like.
Once all done, turn the campaign to live! Your branch questions should turn to live automatically.