
How to Test an Email Campaign
Before launching your PropFuel email campaign, it’s critical to test your campaign to ensure everything is working correctly. Testing allows you to review the email content, check-in actions, and overall campaign functionality before sending it to your contacts.
Steps to Send a Test Email in PropFuel
Step 1: Navigate to Your Campaign
Log in to your PropFuel account and go to the Campaigns section.
Open the campaign you want to test.
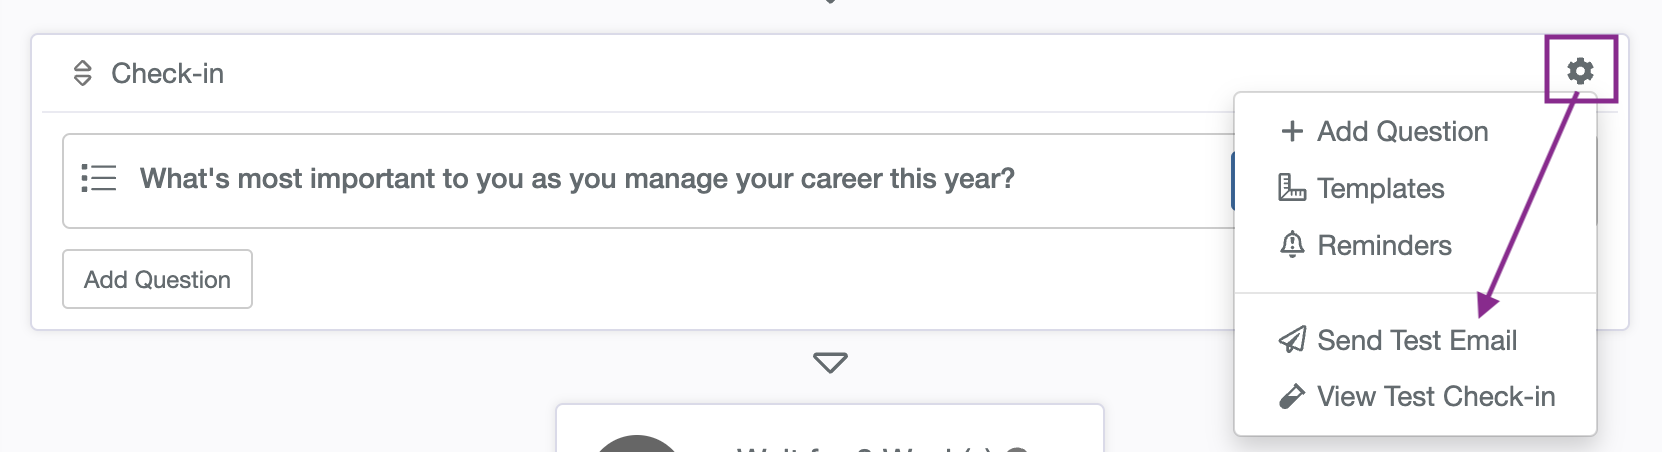
Step 2: Select the Check-In to Test
Find the specific check-in email you want to review.
Click the gear icon next to it.
Step 3: Send a Test Email
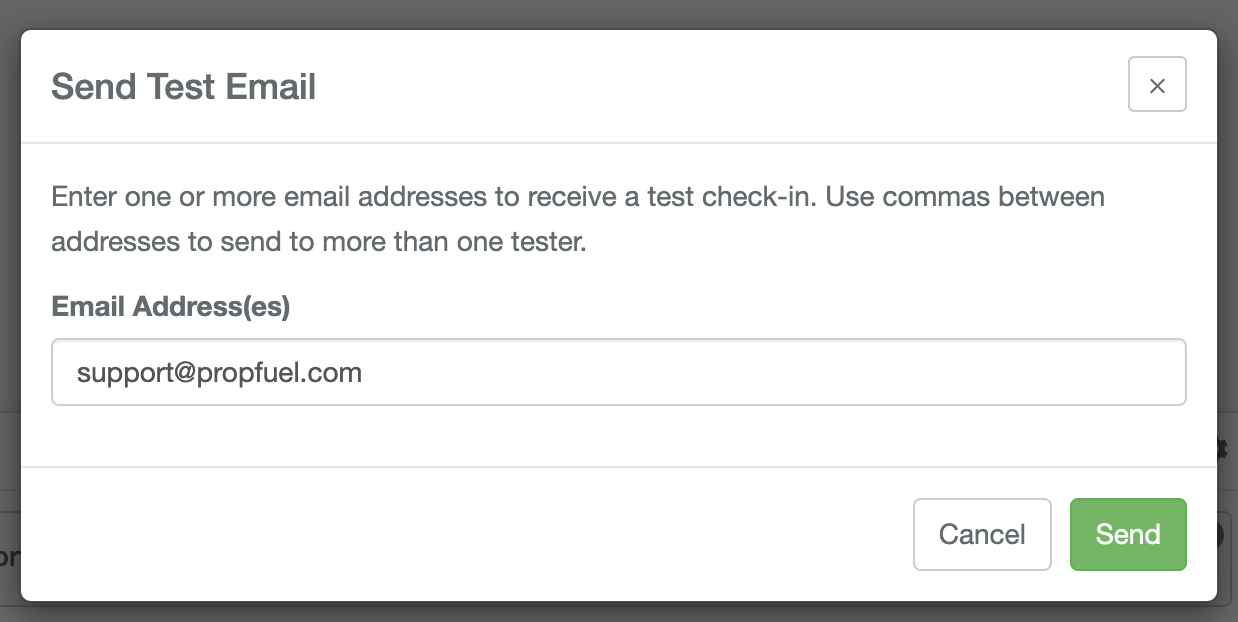
Click “Send Test Email.”
A pop-up box will appear where you can enter multiple email addresses.
Separate multiple addresses with a comma.
Your email will automatically be pre-filled.
Step 4: Receive and Review the Test Email
The test email will arrive in your inbox with [TEST] in the subject line.
Click through the email and verify that:
The content is correct.
The button links work as expected.
The question actions are set up properly.
Important Notes About Testing in PropFuel
If your campaign is in Draft mode, the button links remain active until the campaign is set to Live.
If your campaign is Live, test email button links will only remain active for 12 hours, and any test responses will automatically be removed.
Testing ensures your campaign emails function correctly, helping you avoid errors before launching to your audience.
By following these steps, you can verify and optimize your PropFuel email campaign before sending it to contacts. Testing is an essential step to ensure a seamless user experience and successful campaign engagement.
Troubleshooting: Test Email Shows the Question Again Instead of Your Workflow
If you click a response button in your test email and see the question displayed again instead of your expected landing page or workflow action, you've likely been flagged by PropFuel's bot detection. PropFuel includes a bot detector that identifies when a non-human (such as an email security scanner) clicks a button in an email. When this happens, PropFuel re-displays the question and asks for a manual click to confirm a real person is responding.
To resolve this, simply click the Submit button on the re-displayed question. PropFuel will recognize you as a real person, and your workflows should fire as expected from that point forward. This is normal behavior and does not indicate a problem with your campaign — it's a safeguard to ensure that bot clicks from email security tools don't trigger your workflows or skew your response data.