
Switching AMS Systems in PropFuel
Switching AMS systems can feel overwhelming, but with PropFuel, the process is smoother than you might expect. PropFuel’s flexible integrations and user-friendly tools make it easier to keep your campaigns running and your data clean during the transition.
PropFuel offers several connections with various AMS systems. Check our list of supported connectors to see if yours is included. If it’s not listed, reach out to us at support@propfuel.com for assistance.
Here’s a detailed, step-by-step guide to help you confidently make the switch.
1. Identify Your Live Campaigns
Start by reviewing your current campaigns with upcoming sends. These campaigns are actively enrolling contacts on an ongoing basis, so they will need to be updated with new AMS workflows to ensure continued automation.
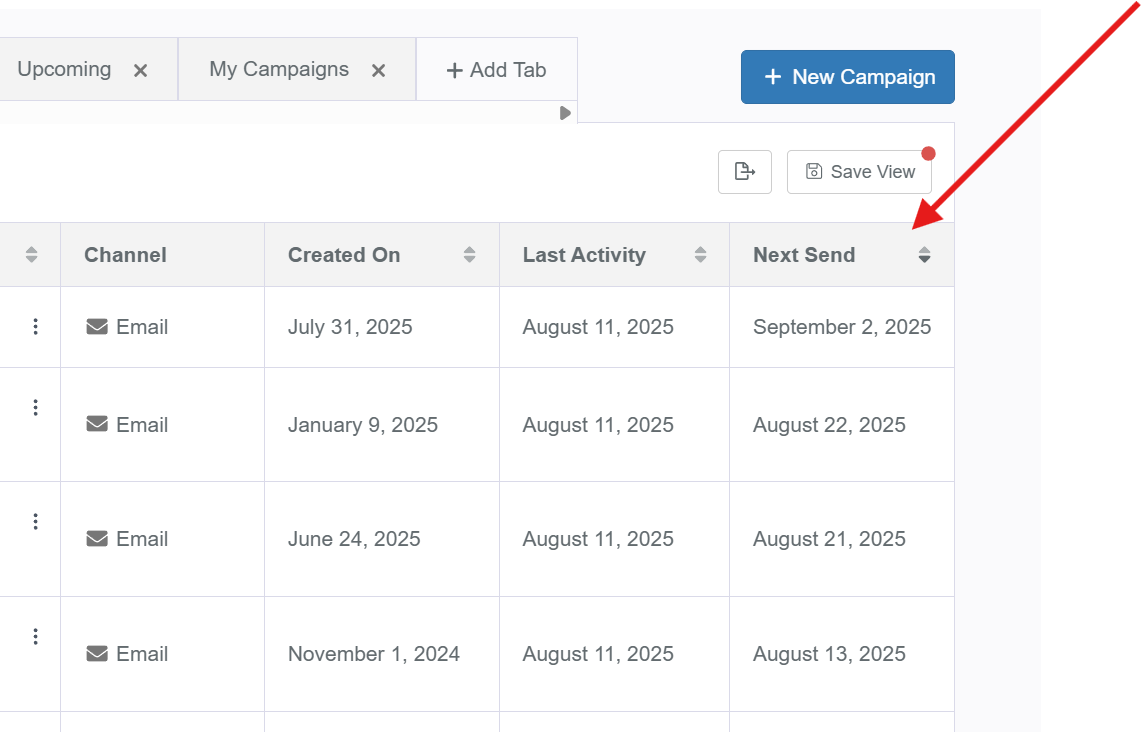
Pro Tip: On the campaigns page, sort by Next Send to quickly spot which campaigns have upcoming sends and need your attention.
2. Review Campaign Segments
Click into each live campaign and review the contacts tab. Take note of which segments you are currently using so you can replicate this setup in your new AMS.
Are you enrolling contacts 60 days before their expiration date?
Do you pull a report listing all new members?
Or use other criteria?
These details are essential to confirm so you can build the right reports or fields in your new AMS. Keep in mind that each AMS connection to PropFuel can work a little differently. Be sure to review your new AMS system’s PropFuel documentation to understand exactly how contacts can be enrolled into your campaigns.
Now that you know what information is needed for the new AMS segments, let’s get your new AMS connected to PropFuel.
Installing the new AMS connector is straightforward:
Navigate to Settings → Advanced → Connectors
Follow the prompts to input your AMS credentials and complete the setup.
4. Set Up New Fields for Clean Data Mapping
Once you’ve added your connector, the next step is field mapping.
We recommend creating new fields specifically for your new AMS to avoid confusion and data overwrite following these create a custom field steps.
For example, create a field named Expiration Date - Impexium if your new AMS is Impexium.
This keeps data from the old and new AMS separate, preventing data sync overrides while setting everything up.
After creating the new fields, map the fields in your new connector.
Note: Don’t delete the old AMS connector yet. Keep it active until you’ve finished setting up the new connection, confirmed that data is syncing properly, created the new segments, and added the segments to your active upcoming campaign sends.
5. Verify Your Data with Segments
After adding the connector, creating new fields, and mapping them, it’s a good idea (though not mandatory) to verify that your new AMS data is syncing correctly.
Create a new segment in Propfuel that includes any contact with a filled-in first name (to capture everyone).
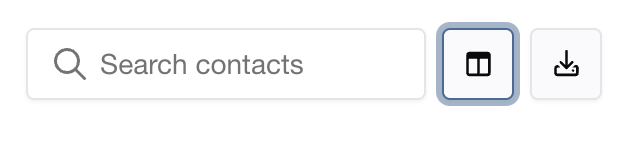
On the Contacts tab in your segment, click the columns icon (see image below) to add additional data columns to for your newly mapped AMS fields.
Check to make sure data is pulling in as expected. This quick check can save troubleshooting headaches later.
6. Build Segments for Your Live Campaigns
Remember when you reviewed the segments in your live campaigns at the start? Now it’s time to replicate those segments for your new AMS system.
Create a test campaign first to ensure contacts enroll properly before adding the segment to your live campaigns.
To create a test campaign:
Create a new campaign.
Name it something like “ZZZ testing workflow.”
Set it as either a scheduled or sequence campaign (it doesn’t matter since it won’t actually send any content).
Within the test campaign on the Contacts tab, add your newly created segment(s) that includes your new AMS data. Since this is a test campaign, choose any of the sync behaviors — it will not impact our data sync testing.
Monitor the enrolled contacts to confirm that the right people are being pulled in.
8. Switch Over Your Live Campaigns
If your test segments enroll the correct contacts, you’re ready to update your live campaigns:
Go to each live campaign and remove the old segment(s) from the Included Segments section.
Add the new segment(s) and choose the appropriate sync behaviour.
Repeat this process for the suppression segments.
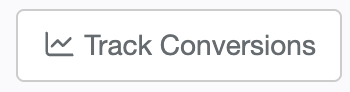
Remember to update your conversion segments by going to the campaign History tab and selecting "Track Conversions". Choose your new conversion segment from the dropdown and click "Track Segment".
Final Thoughts
Transitioning AMS systems involves many moving parts, but PropFuel’s flexible design makes the process manageable and straightforward. Taking it step-by-step, verifying your data as you go, and testing segments before going live will help ensure a smooth changeover—without losing contacts or missing communications.
If you need help at any step or want to discuss your specific setup, reach out to our team at support@propfuel.com. We’re here to support you every step of the way!