
Pausing or Stopping an Email Campaign
There might be a few scenarios where you want to pause or stop a campaign:
You're still editing a live campaign with enrolled contacts, and it's about to send
There's an issue with the enrolled contacts, and you need to troubleshoot
You're looking to stop email sends for a short period (for example, for a holiday or busy conference week)
There's been an organizational change requiring the campaign to be stopped indefinitely
In each of these scenarios, we'd suggest a different approach. Below, we'll suggest our recommended approach(es) for each of these situations; please email support@propfuel.com for guidance for your particular situation.
1. A campaign is about to send and isn't ready
If you're still editing a live campaign with enrolled contacts and it's about to send, you have two options:
Push back the send date or drip timing to give yourself enough time to make the edits. You can always move it back up once the edits are done. This is the easiest solution if you just need a few days!
If you're not sure how long you need, or are worried about an accidental send, navigate to the Settings tab of the campaign, and scroll down to the "Danger Zone." Select "Remove All Contacts." If you have any active segments in the Contacts tab, remove them to avoid having the contacts being populated again after removal.
2. There's an issue with the enrolled contacts
If you're looking to halt a campaign because there's an issue with contacts not being properly removed from a campaign and you need to troubleshoot, we do not recommend removing all contacts. Especially for live sequence campaigns, this can make re-enrollment pretty challenging.
Instead, take the following steps:
If this is a scheduled campaign or does not have ongoing enrollment, we suggest you check your connecting system (your AMS or marketing platform) to ensure the counts are correct for that query or report. If this is a sequence campaign with ongoing enrollment, we suggest you go to the Contact tab and add your active segment to the suppressed segments section to temporarily suppress everyone while you correct the issue. Once fixed, you can remove the suppressed segment to make everyone active in the campaign again.
If you already have existing suppressed contacts in place, make sure those have the correct counts and contacts. You can do this by navigating to the Contacts tab of the campaign, and scrolling down to the Suppressed Contacts section.
If you need additional assistance suppressing or removing contacts, please contact your CSM. Often we can troubleshoot with less effort than you removing all contacts mid-campaign and having to restart it again!
3. You need to pause sends for a short period of time
If it's a scheduled campaign, push back the send dates. Be sure to also push back any relevant recently sent check-ins' reminders; you can do this by clicking the gear icon for that check-in and selecting Reminders.
If it's a sequence campaign, you could lengthen the delay between check-ins. These can always be changed back. Alternatively, if you don't mind people skipping their next check-in, you could add your Included Segment, to the Suppressed Segment section on the campaign's Contact tab. This would essentially suspend all sends but keep contacts within the same cadence of the campaign until you remove the suppression list.
4. The campaign needs to be stopped indefinitely
If you're unsure whether a campaign will ever be relaunched due to an organizational change, we recommend removing all contacts. To do this, navigate to the Settings tab of the campaign, and scroll down to the "Danger Zone." Select "Remove All Contacts." If you have active segments in the Contacts tab, remove them. This process will remove future sends, while still preserving the reporting metrics, as well as the hard work you did to build the check-ins! You can then use all of this later.
If you decide to restart this campaign, it is best to copy the campaign and update accordingly or add contacts back by adding your segments to the Contacts tab.
5. You want to remove a reminder on an already sent email
Once your check-in sends, you can still reschedule or prevent the reminder from sending.
To do this at the campaign level, navigate to the Settings tab and change the default reminder settings.
To do this at the check-in level, navigate to the History tab and hit the gear icon in the Question box.
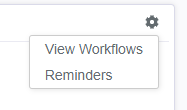
If you remove the reminder or reschedule it for a time window that has already passed since the initial check-in, the reminder will not be sent. You can find more information about reminders here.