PropFuel Connectors: How to Integrate PropFuel With Other Systems
Connectors allow you to connect PropFuel to an external system. The primary use case is to add to and suppress people from PropFuel campaigns based on activity in your AMS.
PropFuel has more than 50 connectors and growing. See documentation for each connector.
Installation
Installing and configuring a connector is a simple, two step process.
Step 1: Gather any necessary information. Depending on the system, we will ask for a few data points to connect or ask you to connect via OAuth to the external system. For system specific help, see the documentation for each connector.
Step 2: Install your connector. Head to Team Settings -> Advanced -> Connectors. All available connectors will be listed. Select the connector you want to configure, and click "Add". If you would like to connect with a system that is not listed, let us know, and we can look into adding it. You can also look at our Zapier integration, which allows you to connect with the 1000+ apps that system connects with.
Field Mapping
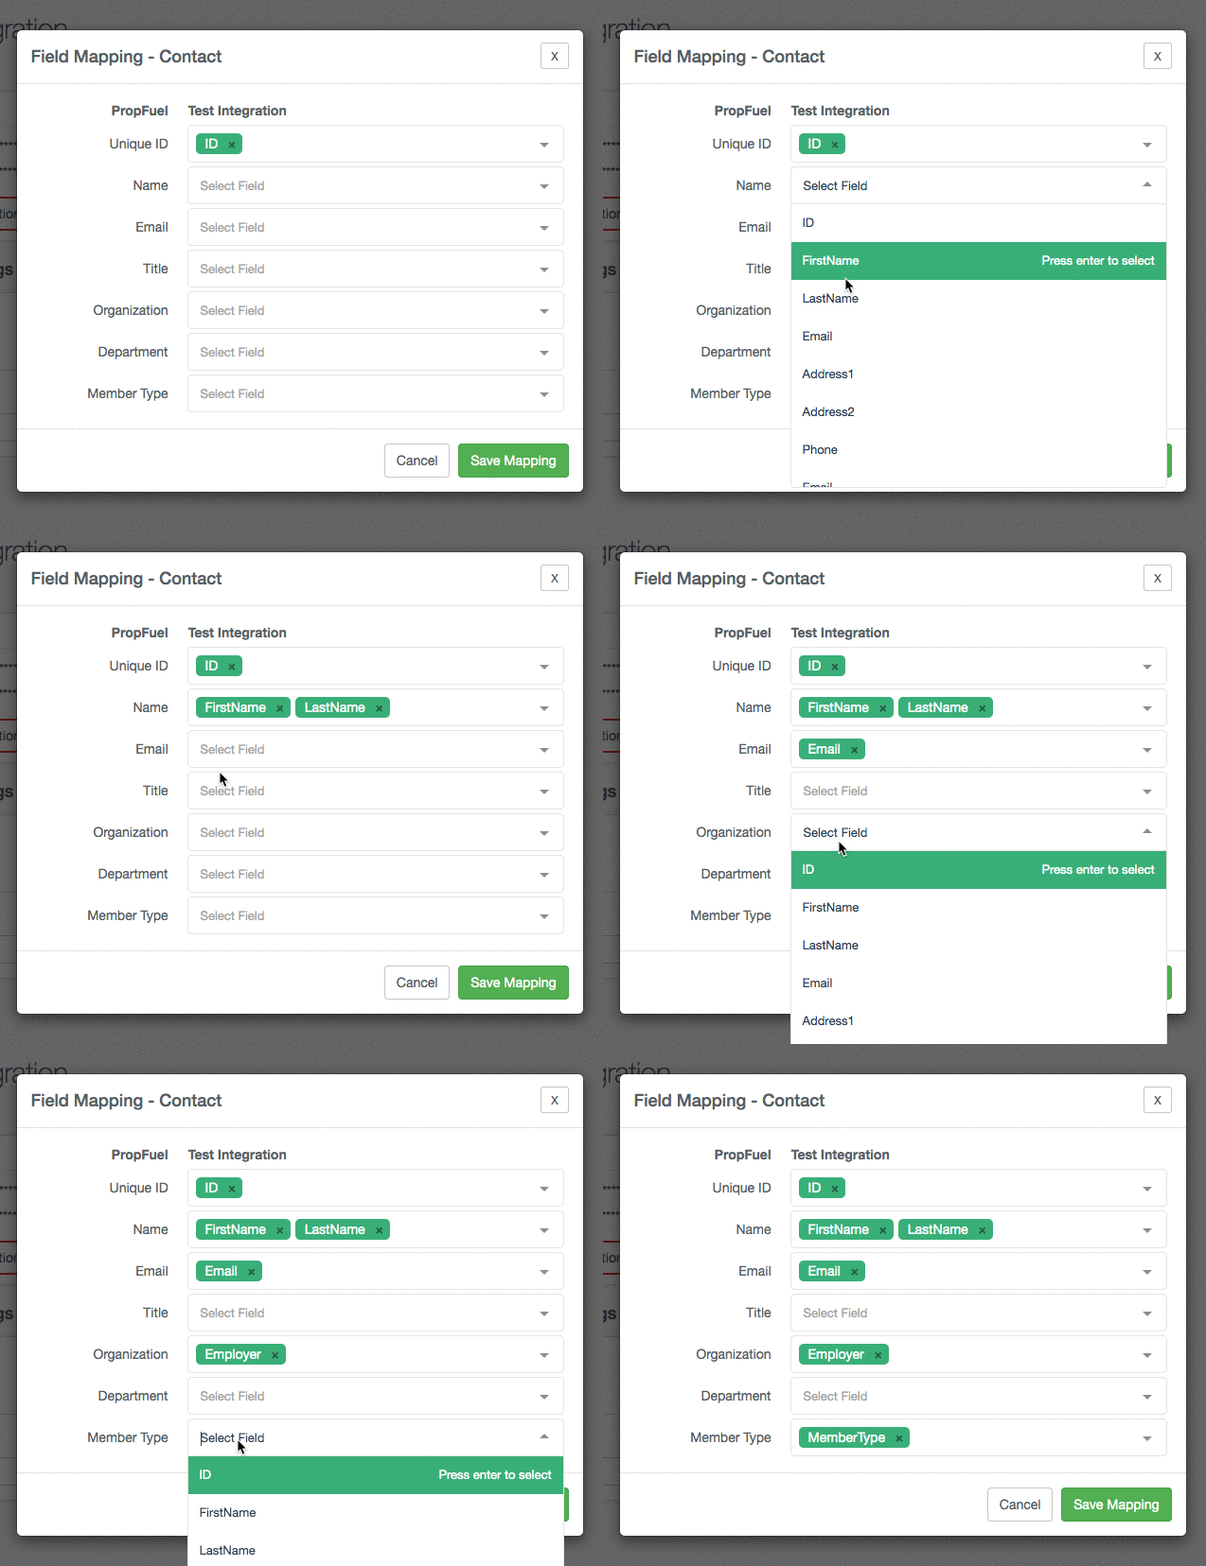
After connecting your other system, you'll need to map your fields in PropFuel to fields in your outside system. Mappings are how we know what fields in your external system to store and where to put them in PropFuel.
You will need to map any fields that you would like to store in PropFuel for a contact. These fields and the data can later be used to trigger people into and out of campaigns, as well as pull in personalization for a contact, such as their organization or first name.
To map fields, navigate to Settings -> Advanced -> Connectors -> Click "Edit" in your connector box -> Configure.
On the left are all the fields in PropFuel you can map. On the right are drop-downs with all the fields available for mapping in your external system. You can select one (or more) fields from your external system to store in a corresponding field in PropFuel. If you select more than one field in the mapping a space will be added between them.
💡 If you need additional fields mapped that are not provided out-of-the-box in PropFuel, you can create custom fields to map. See instructions for creating custom fields.
Triggers
A trigger is how you add people to your campaign from a connector. Each connector has its own set of triggers based on what data is available via the API.
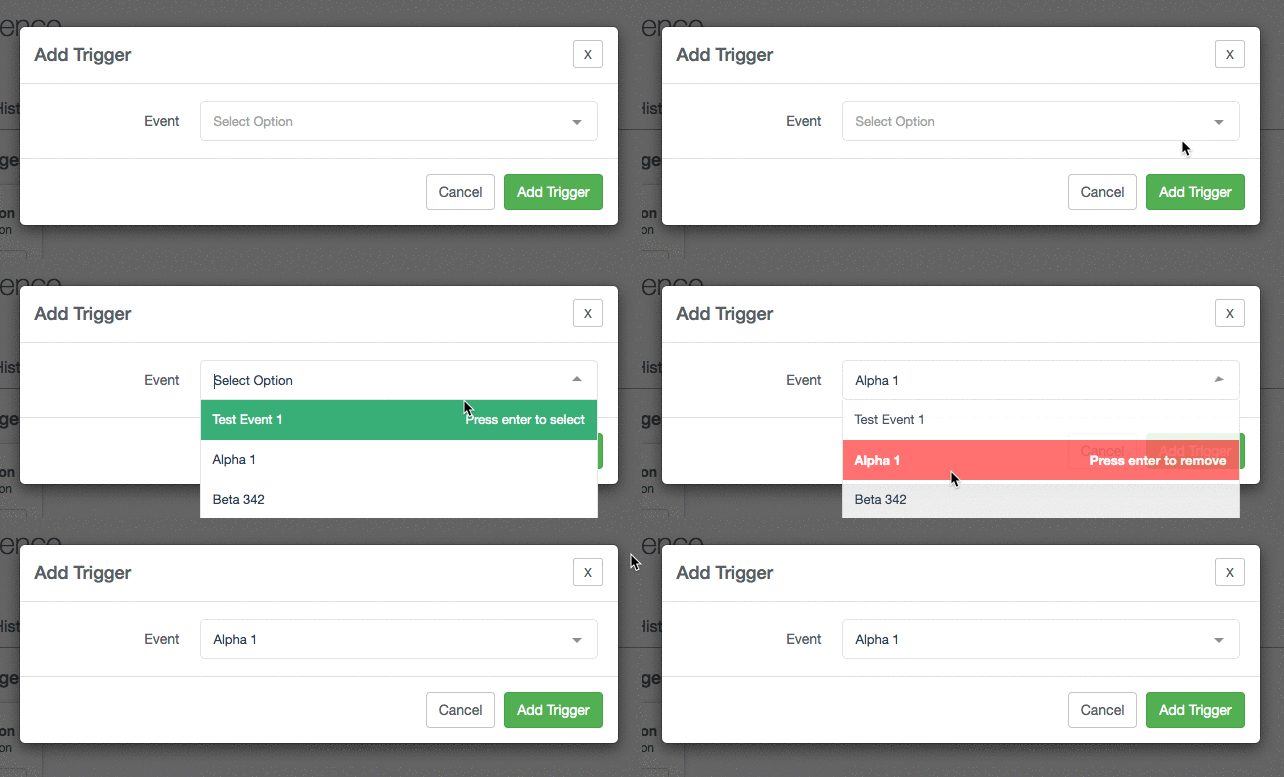
Triggers live within workflows on your campaigns. To add a trigger, open your campaign and click on the "Workflows" tab at the top of the page. From there, create a workflow, and click on "Add Trigger." You can select the integration and trigger you would like to configure. The next dialog will ask you to define the fields for your search. Here is an example of a trigger based off of event registrations, it is prompting you to select the event you want to tie the trigger to.
After configuring your trigger, you will want to add an action to Add or Remove the contacts that match that trigger to the campaign. You can add more than one workflow to a campaign. Once a contact is added to a campaign via a workflow, they behave just like a contact that was uploaded or added manually. You can manage them on the "Enrolled Contacts" tab of the campaign.
Actions
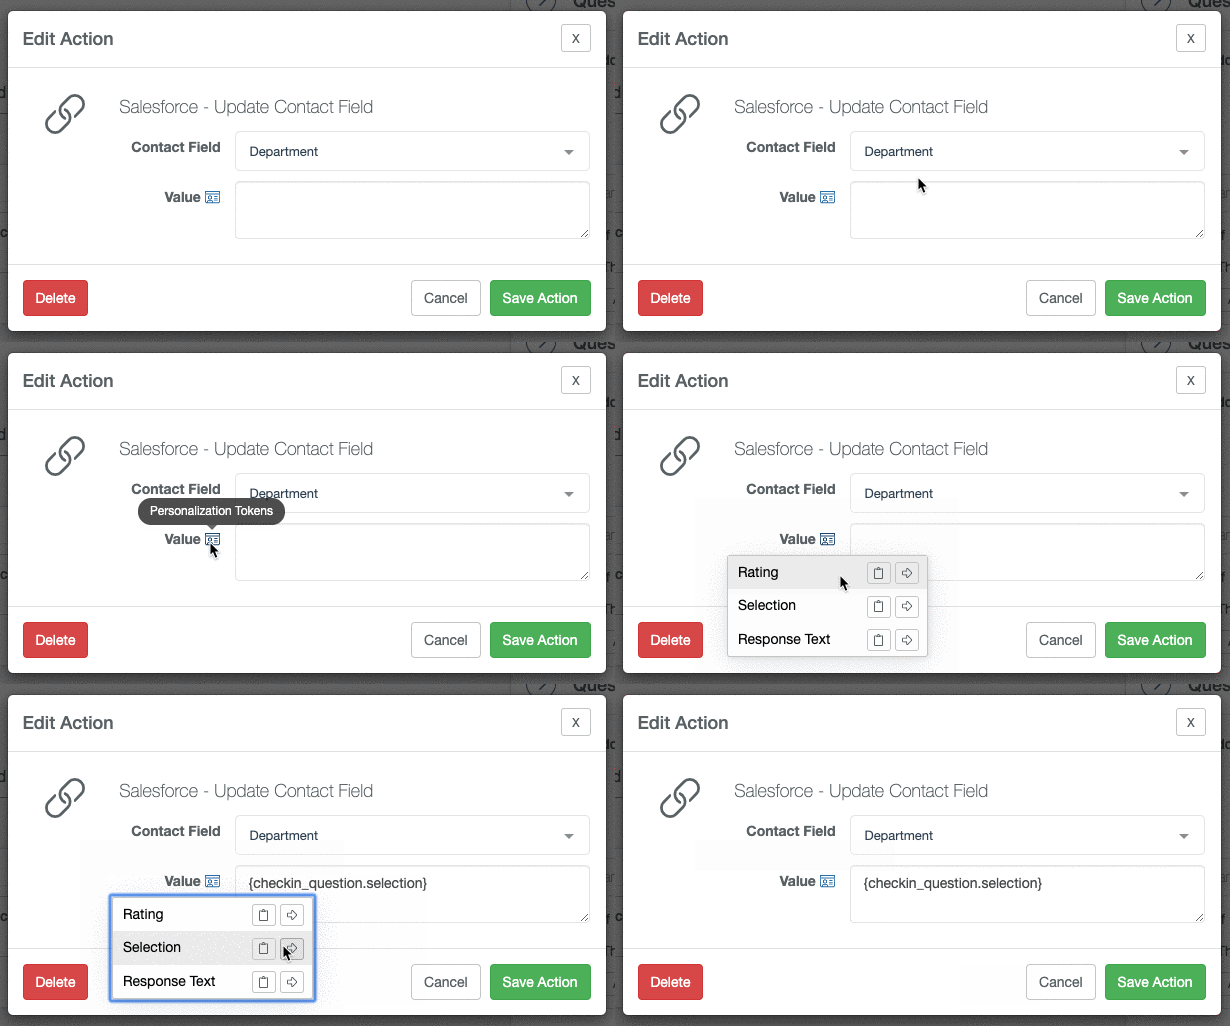
Some connectors have actions available that allow you to write back data to your external system. Please see the documentation for your connector to see what write back options are available.
Tokens are available to send response data along to other systems. Where available, click on the personalization card and select which information you would like to include.
Considerations
Contacts can only be added to (or removed from) a campaign once through a connector workflow. Connectors are built so that they process a contact one time and then do not process the contact again in a single instance of the connector workflow. If you have questions about this, please contact your Client Success Manager.


